Creating a User Group
In the AuditBLOOM system, user groups are used for efficient management of access rights and user responsibilities. Creating a group is the first step towards organizing users by departments, projects, or roles.
In this section, you will learn how to create a new user group, add members to it, and configure the basic settings.
How to Create a Group
Roles:
- Administrator
- User Management
Workplace Type:
- Full Workplace
Step 1: Open the "Groups" Section
-
Log in to the AuditBLOOM system with "Administrator" or "User Management" rights.
-
Go to the "Settings" section in the main menu.
-
Select the "Groups" option.
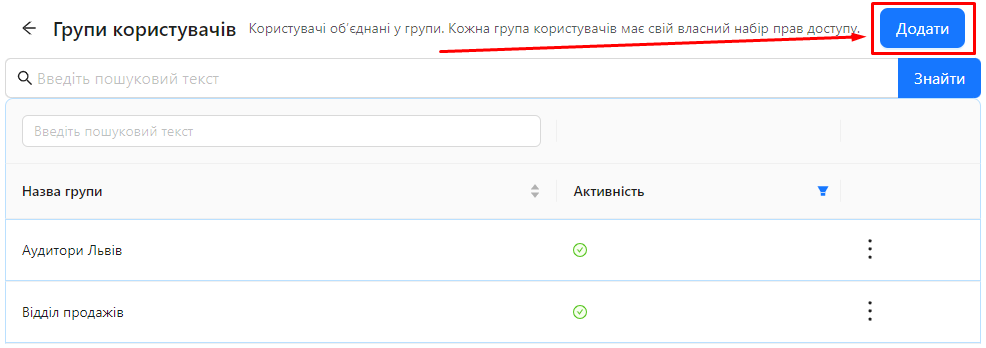
In this section, a list of existing user groups will be displayed. The table contains two columns:
- Group Name: The name of the user group.
- Activity Status: The status of the group's activity (active/inactive).
Step 2: Click the "Add" Button
-
Click the "Add" button located at the top of the page.
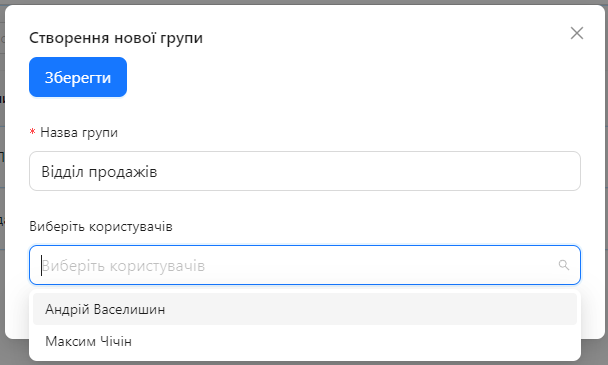
Step 3: Fill in the Group Creation Form
-
In the opened form, enter the necessary information:
-
Group Name: Enter a unique name for the new group.
For example: "Sales Department"
-
Select Users: Choose the users you want to add to the group.
-
You can use the search field or scroll through the list to find the required users.
-
Check the boxes next to the names of the users to add them.
-
-
-
Check the entered data and ensure you have selected the correct users.
-
Click the "Save" button to finish creating the group.
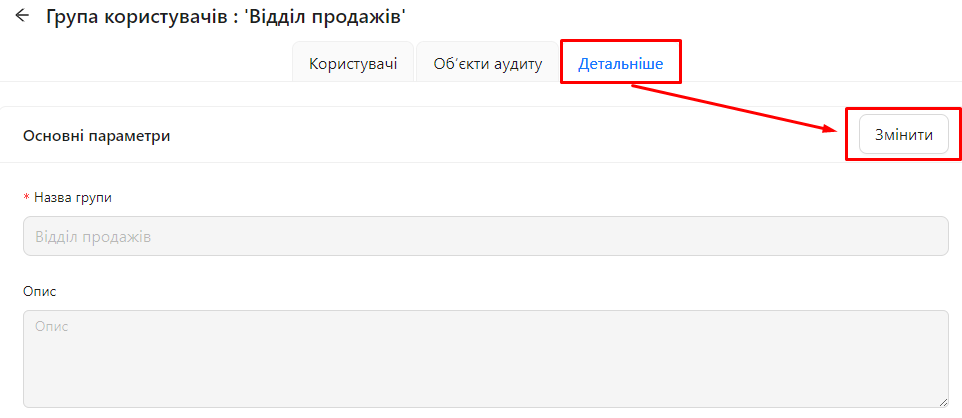
Step 4: Add a Description and Configure Audit Objects
-
After creating the group, go to the group. To do this, click on the group name in the group list.
-
Add a group description to explain its purpose.
-
Go to the "Details" tab.
-
Click the "Edit" button.
-
Enter a detailed description of the group.
-
Click "Save".
-
-
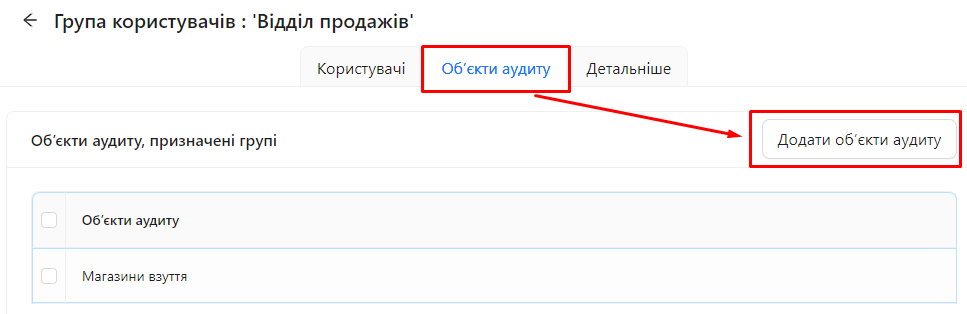
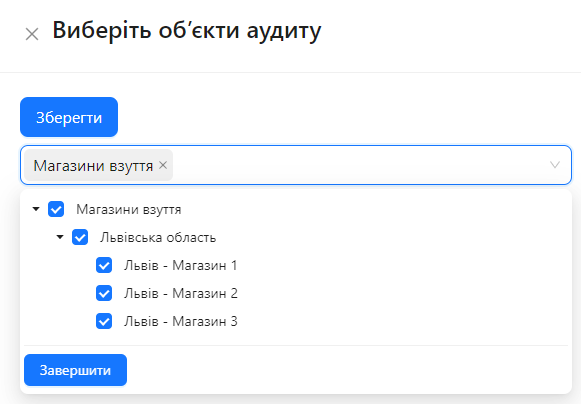
Configure audit objects for which the group will be responsible (if necessary):
-
Go to the "Audit Objects" tab in the group profile.
-
Click the "Add Audit Objects" button.
-
In the window that opens, select the audit objects for which the group will be responsible by checking the boxes next to them.
-
Click "Save".
-
Step 5: Assign Roles (Optional)
- Note: Roles are assigned in a different interface. To assign roles to the group, go to the "Permissions" section in the main menu and configure the necessary settings for the group.
Notes and Tips
-
Group Name: Choose informative and clear group names to make them easy to identify.
-
Group Description: Add a detailed description to explain the group's purpose and its role within the organization.
-
Adding Users: You can add users during the group creation or later by editing the group composition.
-
Audit Objects: Assigning audit objects to a group automatically gives all group members responsibility for those objects.
-
Roles and Access Rights: Don’t forget to assign the necessary roles and access rights to the group to ensure its functionality.
Frequently Asked Questions (FAQ)
Question: Can I add users to the group after it’s created?
Answer: Yes, you can add or remove users from the group at any time. To do so, go to the group profile and edit its members.
Question: How do I assign roles to the group?
Answer: Roles are assigned in the "Permissions" section of the main menu. Select the group and assign the necessary roles.
Question: Can I change the group name after it’s created?
Answer: Yes, you can change the group name by editing its profile. Go to the "Details" tab, click "Edit", make changes, and save them.
Question: What happens to the user’s access rights when I remove them from the group?
Answer: Users will lose all rights and access provided by the group. They will retain only the rights granted directly to them or through other groups.