Schedule Activity
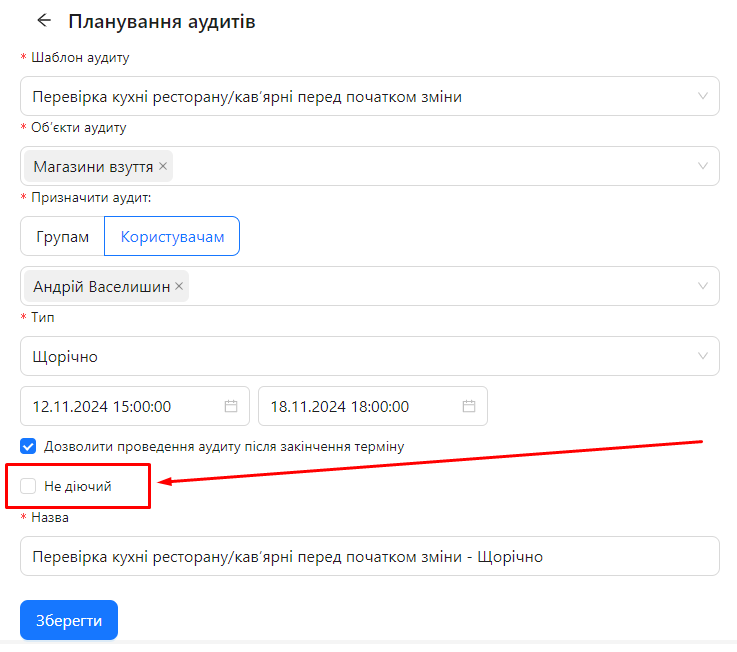
Schedule activity is managed using the "Inactive" checkbox in the schedule settings. This checkbox allows you to temporarily pause or resume a schedule without deleting it.
-
If the "Inactive" checkbox is selected (schedule is inactive):
- All scheduled audits with a start date later than the current date and time will be deleted.
- The system will stop assigning new audits based on this schedule.
-
If the "Inactive" checkbox is deselected (schedule is active):
- The schedule becomes active, and the system will create scheduled audits for each object specified in the schedule for the next 8 days.
- New audits will be automatically assigned according to the schedule settings.
How to Change Schedule Activity
Requirements. You will need:
One of the roles:
- Administrator
- Schedule Management
Type of workspace:
- Full workspace.
Step 1: Open the Schedule for Editing
- Log in to the system with the appropriate access rights.
- Go to the Audit Scheduler - Menu "Planning" -> "Audit Scheduling".
- Find the schedule whose activity needs to be changed.
- Click on the schedule name or the edit button to open its settings.
Step 2: Change the "Inactive" Checkbox
-
To deactivate the schedule:
- Select the "Inactive" checkbox.
-
To activate the schedule:
-
Deselect the "Inactive" checkbox.
-
Step 3: Save Changes
- Click the button "Save" to apply the changes to the schedule.
Notes and Tips
Notes and Tips
- Deactivating a Schedule:
Be cautious when deactivating a schedule, as all future scheduled audits based on this schedule (with a start date later than the current date and time) will be deleted.