Flexible Scheduling
The "Flexible Scheduling" periodicity type allows you to create a schedule with detailed periodicity parameters. You can configure an audit to be conducted every few weeks or months on specific days and times. This is ideal for non-standard inspection schedules that do not fit into predefined periodicity types.
Configuring the "Flexible Scheduling" Type in the Schedule
One of the roles:
- Administrator
- Schedule Management
Type of workspace:
- Full workspace.
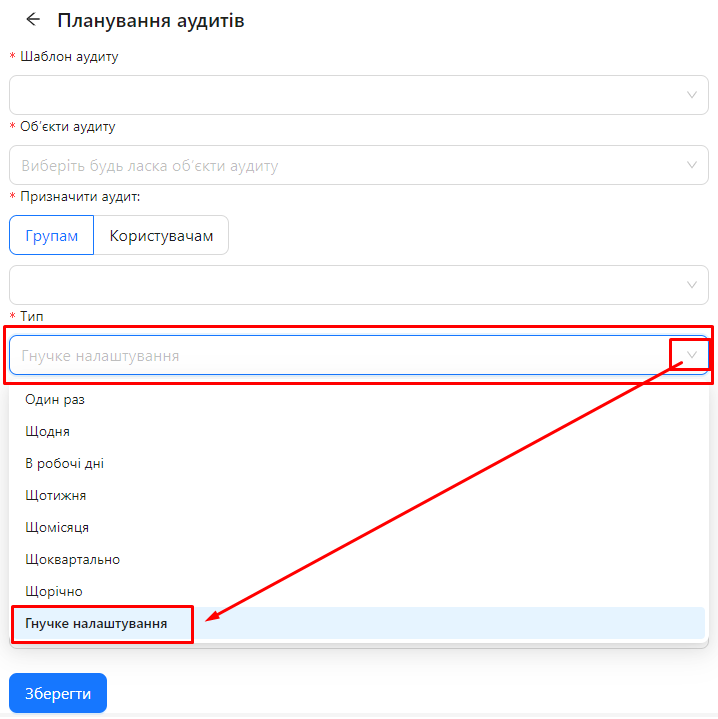
Step 1: Select the "Flexible Scheduling" Periodicity Type
When creating or editing a schedule:
-
In the field "Schedule Type", select the "Flexible Scheduling" option from the list of available periodicity types.
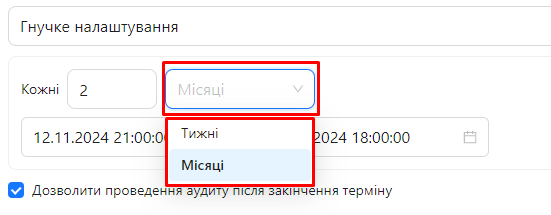
Step 2: Specify the Period Type and Periodicity
-
Period Type:
-
Select from the list: "Weeks" or "Months", depending on how you want to configure the periodicity.
-
-
"Every" Field:
-
Enter a number to define the periodicity.
-
For example, entering 2 means every two weeks or every two months, depending on the selected period type.

-
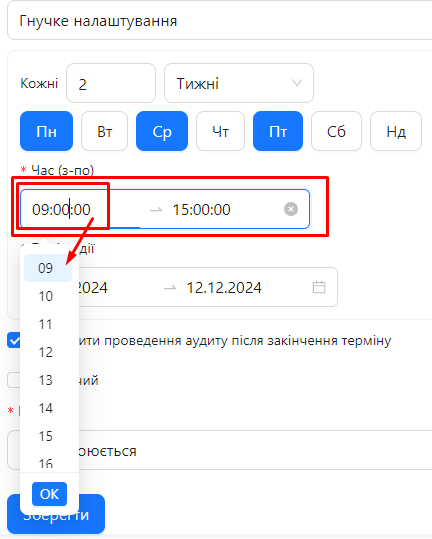
Step 3: Settings for the "Weeks" Period Type
If you selected "Weeks":
-
Select Days of the Week:
-
Buttons representing days of the week (Mon, Tue, Wed, Thu, Fri, Sat, Sun) will appear.
-
Click on the buttons for the days when the audit should take place.
-
You can select multiple days at once.

-
-
"Time (From-To)" Field:
-
Specify the start and end times for the audit.
-
Click on the field to set the time from which to which the audit will be available on the selected days.
Example: 09:00 - 15:00
-
-
Start Date of the Period:
-
Click on the "Start Date" field and choose the date from which the schedule should begin.
Example: 12.11.2024
-
-
End Date of the Period:
-
Click on the "End Date" field and choose the date until which the schedule should remain active.
Example: 12.12.2024

-
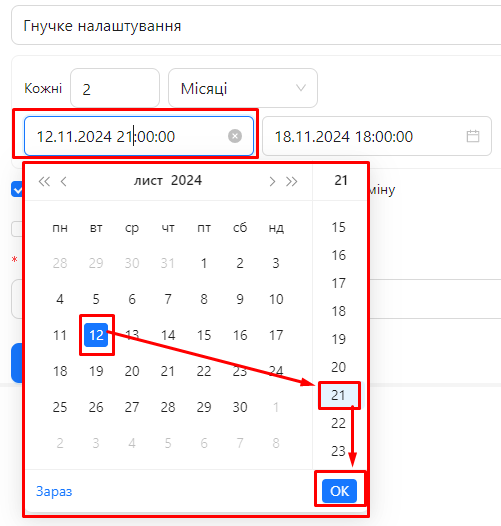
Step 4: Settings for the "Months" Period Type
If you selected "Months":
-
"Every" Field:
- Enter the number of months for the periodicity.
- For example, 2 means every two months.
-
Start Date and Time:
-
Click on the "Start Date and Time" field and select the date and time when the audit should start for each period.
Example: 12.11.2024 21:00:00
-
-
End Date and Time:
-
Click on the "End Date and Time" field and set the date and time by which the audit must be completed for each period.
Example: 12.11.2024 21:00:00
-